Kristen Peterson

Step-by-Step Guide to Creating Your Perfect Wedding Planning Timeline

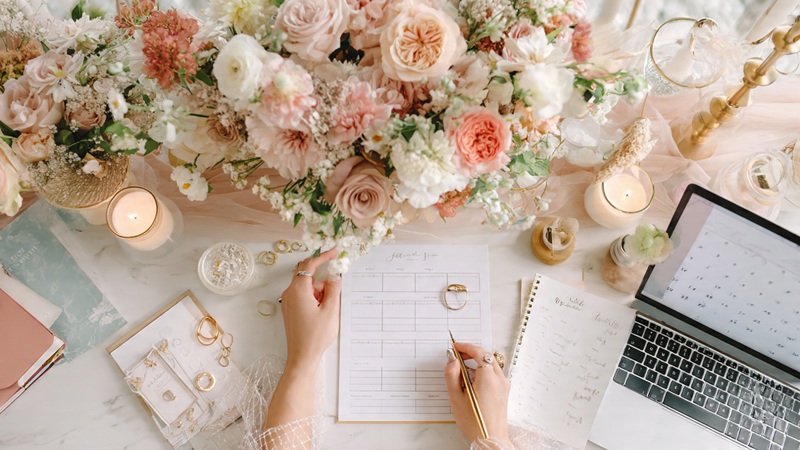
Bride and groom happily planning their wedding timeline with a checklist, flowers, and laptop on the table.

Planning your dream wedding should feel exciting, not overwhelming! A well-structured wedding planning timeline is your secret weapon; it keeps you organized, reduces stress, and ensures every special detail falls perfectly into place. Whether you’re dreaming of an intimate garden ceremony or a grand ballroom affair, this guide walks you through each step, from your first “yes” to your unforgettable “I do.”

Why You Need a Wedding Planning Timeline

Think of your timeline as the heartbeat of your wedding planning journey. It breaks everything down into bite-sized phases, each with clear, achievable goals. With this roadmap in hand, you can confidently move forward knowing you’re on schedule, and no detail will slip through the cracks.

Start with Your Wedding Vision and Priorities

Close your eyes and picture your perfect day. Is it a cozy, candle-lit celebration with your closest loved ones, or a lively, music-filled party surrounded by everyone you know? Maybe you’re envisioning rustic charm, classic elegance, or modern glam. Whatever your style, defining your vision early on helps you prioritize what truly matters and sets the tone for the rest of your timeline.

Anchor Your Timeline with the Wedding Date and Budget

Your wedding date is your planning anchor; it starts the countdown! Once that’s locked in, it’s time to set your budget. Think of your budget as your compass, guiding your decisions on venues, vendors, and every detail in between. A realistic budget helps you plan smartly and keeps surprises at bay.

Divide Your Timeline into Manageable Phases

12+ Months Before

  • Share your engagement joy and start dreaming out loud with family and friends.
  • Decide on your wedding theme or style.
  • Set your budget and create a rough guest list.
  • Research and book your ceremony and reception venue.
  • Begin scouting key vendors, think photographer, caterer, and DJ.
  • Choose your wedding party.
  • Start wedding dress shopping (it’s never too early!).
  • Launch your wedding website and set up your registry.

6–9 Months Before

  • Book your officiant and send those beautiful save-the-dates.
  • Choose your wedding invitations and plan ceremony details.
  • Hire additional vendors like florists, rental companies, and entertainment.
  • Reserve accommodations and transportation for out-of-town guests.
  • Begin your beauty and fitness routines to feel your best.
  • Plan pre-wedding festivities, bridal showers, bachelor or bachelorette parties, and more.

3–6 Months Before

  • Send wedding invitations.
  • Finalize your menu and cake tasting details.
  • Schedule dress fittings and purchase your wedding rings.
  • Write your vows and prepare any toasts or speeches.
  • Book your honeymoon and finalize travel arrangements.

Final Month

  • Confirm every last detail with your vendors and update your master timeline.
  • Plan your rehearsal dinner and confirm RSVPs.
  • Have your final dress fitting and do your hair and makeup trials.
  • Create your seating chart and reception floor plan.
  • Prepare wedding favors and a small “emergency kit” (just in case!).

Day Before & Day Of

  • Do a final walkthrough of your venue.
  • Hold the rehearsal with your bridal party.
  • Delegate day-of responsibilities to trusted friends or your coordinator.
  • Most importantly, relax, breathe, and savor every single moment!

Building Flexibility into Your Timeline

Even the best-laid plans can shift, and that’s perfectly okay! Leave room for last-minute tweaks, vendor reschedules, or unexpected surprises. A flexible timeline helps you stay calm and adaptable while still keeping the big picture in focus.

Crafting the Day-Of Timeline

This is where all your planning comes to life! Plan the flow of the day, from the ceremony start time to the cocktail hour, dinner, toasts, cake cutting, first dance, and send-off. Share this detailed schedule with your vendors and wedding party so everyone is on the same page and the day flows effortlessly.

Communicating Your Timeline

Once your timeline is finalized, share it with everyone involved, vendors, wedding party, family members, and keep a copy handy for yourself. Clear communication prevents confusion and allows you to fully immerse yourself in the joy of your wedding day.

Sample Timeline Templates

  • For small, intimate weddings: A simple, condensed timeline focused on the key milestones.
  • For large celebrations: A detailed, structured schedule with vendor arrival times and activity breakdowns.
  • For destination weddings: A travel-friendly timeline that accounts for flights, hotel check-ins, and local excursions.

A wedding planning timeline isn’t just a checklist; it’s your roadmap to a stress-free, joy-filled celebration. By breaking your planning into phases, staying flexible, and keeping communication open, you’ll glide from engagement to “I do” with confidence and excitement.

The magic of your wedding day lies in its details, and a well-crafted, personalized timeline ensures that every one of those moments shines beautifully on schedule. Here’s to planning your dream wedding, step by step, with heart, joy, and anticipation!

This post is generated by ChatGPT
The Ultimate Guide to Choosing Your Perfect Wedding Menu

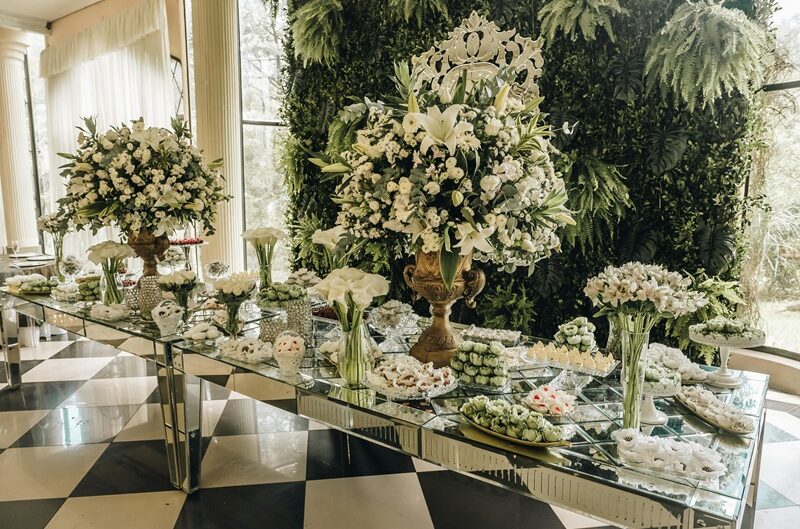
Elegant wedding dessert table with floral centerpieces and assorted sweets, showcasing a luxurious and beautifully styled wedding reception setup.

Selecting your wedding menu is one of the most exciting parts of planning your big day, it’s where your love story meets flavor, creativity, and celebration. From signature cocktails to mouthwatering entrées, your menu does more than feed your guests, it creates moments, memories, and a dining experience they’ll talk about long after the last slice of cake. Let’s dive into this ultimate guide to crafting a wedding menu that’s as unique and unforgettable as your love story.

Why the Wedding Menu Matters

Your wedding meal is more than just a meal, it’s the centerpiece of the celebration. Every bite adds to the mood, complements your theme, and shows your guests how much you care. Whether it’s a candlelit dinner filled with elegance or a relaxed outdoor feast under the stars, the right menu turns your reception into a truly immersive experience.

Step 1: Define Your Wedding Style and Vision

Your wedding vibe sets the tone for your entire menu. Are you envisioning a relaxed beach celebration, a glamorous black-tie event, or a cozy countryside gathering?

  • Formal weddings pair beautifully with plated multi-course meals featuring gourmet creations.
  • Casual or outdoor weddings shine with buffet spreads, barbecue stations, or family-style comfort food.

Let your theme and personal style inspire every flavor and presentation choice, this is your culinary canvas!

Step 2: Consider the Season and Venue

Seasonal ingredients are your best friends, they’re fresher, more flavorful, and often easier on the budget.

  • Spring and summer weddings call for bright, refreshing dishes with plenty of greens, herbs, and seasonal fruits.
  • Fall and winter weddings pair well with warm, rich comfort foods like roasted vegetables, slow-cooked meats, and spiced desserts.

Also, check what your venue kitchen can accommodate. Outdoor spaces might limit menu complexity, while hotel venues often have flexible catering setups. Communication with your caterer is key!

Step 3: Choose Your Courses Thoughtfully

A wedding menu should feel balanced and exciting from start to finish.

  • Appetizers: Think colorful hors d’oeuvres, charcuterie boards, or fresh salads to kick things off.
  • Main courses: Options like tender filet mignon, roasted chicken, or a flavorful vegetarian risotto cater to every palate.
  • Desserts: Beyond the wedding cake, consider dessert tables, mini tarts, or a donut wall for a fun twist.

Each course should flow naturally into the next, creating a deliciously seamless dining experience.

Step 4: Accommodate Dietary Restrictions

Inclusivity is always in good taste! Make sure everyone can enjoy the meal by offering vegetarian, vegan, gluten-free, and nut-free options.

Clearly labeling dishes or including a variety of selections ensures that no guest feels left out, and everyone leaves happy (and full).

Step 5: Collaborate with Your Caterer or Chef

Your caterer is your culinary partner in crime, so communicate openly! Schedule tastings, ask about presentation options, and don’t hesitate to tweak recipes to suit your style.

Discuss ingredient sourcing, seasonal swaps, and service timing. The best menus are created when the couple and caterer work together like a well-rehearsed duet.

Step 6: Add Personal Touches

Make your menu yours. Include dishes that hold special meaning, maybe your first date meal, a recipe from your heritage, or a dessert you both adore.

These small, heartfelt touches add warmth and authenticity to your celebration, transforming your menu into a delicious expression of your story.

Step 7: Pair Drinks and Cocktails Perfectly

A perfectly paired drink can elevate the entire dining experience.

Offer signature cocktails inspired by your relationship, a curated wine list, or a craft beer station for a fun twist.

Even mocktails can add flair. Imagine a sparkling citrus spritz or a berry-infused cooler that complements your menu beautifully.

Common Pitfalls to Avoid

  • Too many choices: A crowded menu can overwhelm guests and slow down service.
  • Ignoring dietary needs: Nothing dampens the mood like guests feeling left out.
  • Poor timing: Coordinate serving times to keep the flow smooth and stress-free.
  • Underestimating the budget: Food and drinks are major expenses; plan accordingly.

Creating your wedding menu should be a joyful, creative process that celebrates who you are as a couple. With thoughtful planning, open collaboration, and a sprinkle of personality, you can serve up a feast that’s as memorable as your vows.

Here’s to a celebration filled with flavor, laughter, and love, one unforgettable bite at a time.

This post is generated by ChatGPT

Must-Ask Questions for Wedding Vendors: Your Ultimate Guide to Choosing the Perfect Team

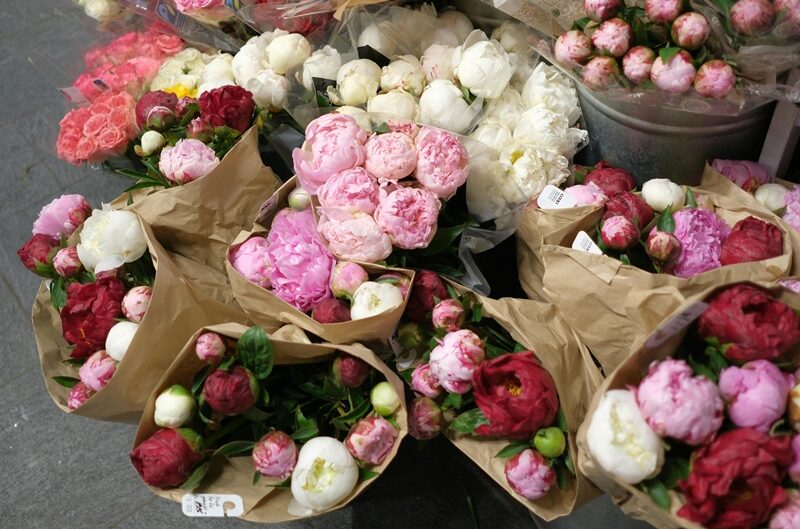
Beautiful bouquets of red, pink, and white peonies arranged for a wedding florist display.

Planning a wedding is one of the most exciting adventures of your life, filled with dreams, emotions, and a ton of decisions. Among the most important choices you’ll make? Picking the perfect wedding vendors. These are the experts who turn your Pinterest boards into reality and make your big day truly magical. Asking the right questions helps you find vendors who not only match your style but also bring calm, creativity, and professionalism to every moment. Here’s your ultimate guide to knowing exactly what to ask each vendor before saying “I do” to their services!

Wedding Planners: The Masters of Coordination

A wedding planner is your behind-the-scenes hero who keeps every detail running smoothly. To find your ideal match, ask:

  • Are you available on my wedding date, and how many hours will you be present?
  • What services do you offer, full planning, partial planning, or day-of coordination?
  • How many weddings do you handle at the same time?
  • Can you share references or testimonials from past clients?
  • How do you handle unexpected changes or emergencies?
  • What is your fee structure, and are there any additional costs?

These questions help you understand how hands-on your planner will be and how they handle pressure when things get hectic. The right planner will make you feel relaxed, supported, and completely taken care of.

Photographers and Videographers: Your Memory Keepers

Photos and videos capture the magic long after the celebration ends. To ensure you love every frame, ask:

  • Is my wedding date available?
  • What packages do you offer, and what do they include?
  • How many weddings do you shoot per weekend?
  • Can I view full galleries from recent weddings?
  • When will we receive our edited photos and videos?
  • Do you have backup equipment or a second shooter in case of emergencies?
  • What’s your cancellation or refund policy?

These answers reveal their style, reliability, and attention to detail—so you can relive your best moments with joy for years to come.

Caterers: Creating a Feast to Remember

Food is love, and your wedding meal should be nothing short of delightful. When talking to caterers, ask:

  • Do you cater at my chosen venue, and do you offer menu tastings?
  • Can you accommodate special diets like vegan, gluten-free, or nut-free?
  • Are drinks, servers, and tableware included in the package?
  • How flexible are you with last-minute guest count changes?
  • What happens to leftovers, and who handles cleanup?
  • What’s your deposit, payment, and cancellation policy?

The best caterers deliver delicious food and flawless service, making every guest leave with a smile (and maybe seconds!).

Venues: Setting the Stage for Your Love Story

Your venue is the heart of your celebration. Before booking, make sure to ask:

  • Is my preferred date available, and what’s the maximum capacity?
  • Are tables, chairs, and linens included, or do I rent them separately?
  • What are the noise restrictions and event end times?
  • Can I bring in my own vendors?
  • Is there on-site parking or shuttle service available?
  • What happens in case of bad weather for outdoor weddings?
  • What are your payment terms and cancellation policies?

Clear answers here ensure your venue fits your style, budget, and guest needs perfectly.

DJs and Bands: The Beat of the Celebration

The right music turns your reception into an unforgettable dance party. Ask your entertainment team:

  • Are you available on my wedding date, and how long will you perform?
  • What music styles do you specialize in?
  • Can we share a playlist, or a “do not play” list?
  • Do you bring all your own sound equipment, and do you have backups?
  • Will you act as an emcee or recommend one?
  • How do you handle song requests from guests?
  • What are your payment and cancellation terms?

A great DJ or band knows how to read the room, match your vibe, and keep everyone moving all night long.

Florists: Turning Blooms into Beauty

Flowers set the mood for your wedding and elevate every photo. Ask potential florists:

  • Can I see sample arrangements or photos of your previous work?
  • What flowers are in season around my wedding date?
  • Do you offer eco-friendly or locally sourced options?
  • How does delivery, setup, and teardown work?
  • How do you handle last-minute flower substitutions?
  • What’s included in your pricing, vases, greenery, setup fees?
  • What are your payment and cancellation policies?

A talented florist will capture your vision perfectly and ensure your floral décor feels fresh, cohesive, and unforgettable.

Hair and Makeup Artists: Helping You Shine

You deserve to feel radiant on your special day. Ask your beauty team:

  • Do you offer trial sessions before the wedding?
  • How many clients do you handle on the wedding day?
  • Can you create different looks for the bridal party?
  • Do you travel to the venue, or should we come to you?
  • What products do you use, and are they suitable for sensitive skin?
  • How long does the full beauty process take?
  • What’s your cancellation and refund policy?

The best artists listen to your preferences, enhance your natural beauty, and make you glow from the inside out.

Coordinators: The Calm Behind the Curtain

Even the most detailed plans need someone to keep them on track. When interviewing coordinators, ask:

  • What’s your exact role and responsibility on the wedding day?
  • How many weddings do you coordinate per weekend?
  • How do you handle unexpected hiccups or emergencies?
  • Will you attend vendor meetings before the big day?
  • Can you share a sample timeline?
  • What are your fees and cancellation terms?

A great coordinator ensures your day flows smoothly, letting you focus on the joy and love, not logistics.

Final Tips for Interviewing Wedding Vendors

  • Listen closely: Their answers reveal not just professionalism but how well they connect with you.
  • Seek flexibility: Weddings have surprises, choose vendors who adapt gracefully.
  • Check reviews: Honest feedback from past couples is gold.
  • Get it in writing: Contracts protect both your expectations and your investment.
  • Trust your gut: Go with vendors who make you feel genuinely excited and confident.

Choosing your wedding vendors is like assembling your dream team, the people who’ll bring your vision to life and keep your day running beautifully. With these must-ask questions, you’ll know exactly what to look for, what to expect, and who truly understands your dream. So go ahead, ask boldly, listen carefully, and enjoy the process of building the perfect crew for your unforgettable wedding day!

This post is generated by ChatGPT
Step-by-Step Wedding Planning Timeline: Stay Organized, Have Fun, and Say “I Do” with Ease

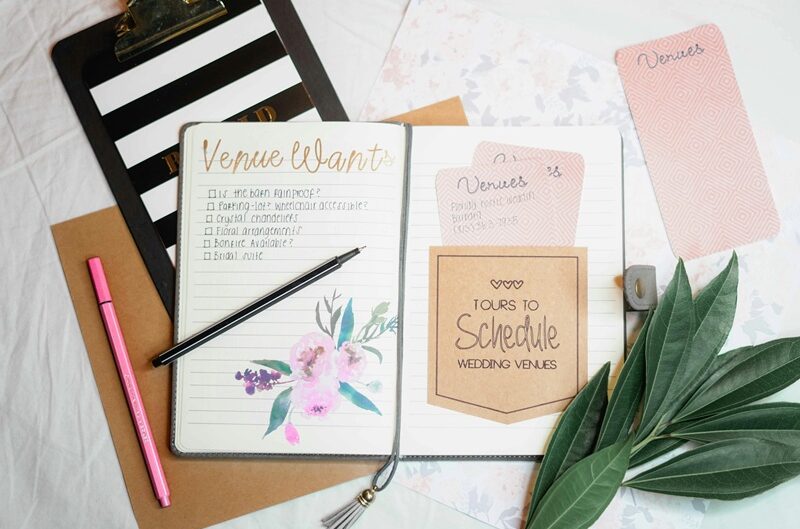
Open wedding planner notebook with a venue checklist, scheduling notes, and pens on a desk, helping couples organize their wedding venue tours.

Planning a wedding is one of life’s most magical adventures, but let’s be honest, it can also feel like juggling a hundred things at once. Between budgets, venues, and dress fittings, it’s easy to feel overwhelmed without a clear roadmap. That’s where a timeline swoops in to save the day!

This step-by-step guide will walk you through every phase of wedding planning, so you stay organized, stress-free, and excited for the big moment when you say “I do.” Let’s jump in and start turning your dream wedding into a reality!

Begin with the Big Picture: Your Vision and Budget

Before you book venues or sample cake flavors, take a moment to dream. Do you see a romantic beach wedding at sunset, a cozy backyard gathering, or a dazzling ballroom affair? Once your vision feels clear, it’s time to talk numbers.

Your budget is the foundation of your wedding; it helps you prioritize what matters most, whether that’s jaw-dropping floral arrangements, a live band that keeps the dance floor packed, or an unforgettable menu. Be open with your partner (and family if they’re contributing) about what’s realistic.

Pro tip: Keep a simple spreadsheet to track your expenses; it makes it easy to adjust as you go and avoid any surprises.

12–18 Months Before: Laying the Foundation

The countdown officially begins! At this stage, focus on the big decisions:

  • Choose Your Wedding Date and Venue – Popular venues get booked quickly, so lock yours in early.
  • Draft Your Guest List – It doesn’t need to be final, but start mapping out your numbers.
  • Hire a Wedding Planner (Optional) – If your budget allows, a planner can be a lifesaver.
  • Book Key Vendors – Prioritize your photographer, videographer, caterer, and officiant.
  • Create a Wedding Website – Share essential info with your guests in one convenient place.

Keep detailed notes on each vendor’s style, pricing, and personality, it’ll help you make confident decisions.

9–12 Months Before: Diving into Details

Now the fun really begins! With the basics in place, it’s time to explore the exciting parts:

  • Shop for Your Dress and Attire – Start early to allow time for fittings and alterations.
  • Book Entertainment – Bands, DJs, and performers can get snapped up fast.
  • Choose Bridesmaids’ and Groomsmen’s Attire – Coordinate colors and styles with your theme.
  • Select Your Invitation Style – Pick a design that matches your wedding vibe.
  • Register for Gifts – Create a mix of practical and fun options for all budgets.
  • Plan Your Honeymoon – Book flights, hotels, and excursions while availability is wide.

6–9 Months Before: Securing the Extras

This is the phase where your wedding vision comes to life:

  • Order Invitations – Don’t forget save-the-dates if you’re sending them.
  • Book Transportation – Shuttles, limos, or party buses for you and your guests.
  • Plan the Rehearsal Dinner – Choose a spot and build your guest list.
  • Decide on Ceremony Details – Think music, readings, and rituals.
  • Taste Cakes and Finalize Menu – Delicious decision-making at its best.

Stay in close contact with your vendors, good communication keeps surprises at bay.

3–6 Months Before: Invitations and Prep

It’s starting to feel real! This is where everything comes together:

  • Send Invitations – Typically 6–8 weeks before the wedding.
  • Schedule Hair and Makeup Trials – Test looks until you feel like your most confident self.
  • Purchase Wedding Rings – Allow extra time if you want engravings.
  • Confirm Vendor Details – Make sure everyone is aligned on timing and expectations.
  • Finalize Ceremony & Reception Schedules – Plan moments like your first dance, speeches, and cake cutting.

Create a “day-of checklist” with essentials like rings, vows, payments, and an emergency kit (yes, pack those safety pins and stain removers!).

1–2 Months Before: The Final Countdown

With just weeks to go, it’s all about the finishing touches:

  • Provide Final Guest Count – Caterers and venues need accurate numbers.
  • Start the Seating Chart – Be thoughtful about who sits where.
  • Pick Up Attire – Do final fittings and accessorize.
  • Confirm Arrival Times – Double-check with your photographer, venue, and transportation.
  • Write Vows and Speeches – Practice aloud so you’re confident and relaxed.

You’ll likely feel a mix of nerves and excitement, and that’s perfectly normal!

1 Week Before: Time to Breathe

This is your week to relax and soak it all in while tying up the last details:

  • Pack for Your Honeymoon – Have everything ready before the big day.
  • Prepare Vendor Payments and Tips – Organize envelopes so nothing’s missed.
  • Attend Rehearsal & Dinner – A beautiful moment with your closest circle.
  • Take Care of Yourself – Get sleep, hydrate, and protect your energy for the celebration.

The Big Day: Celebrate Love

The planning is done, it’s time to live the moment! Your wedding day is about celebrating love with the people who mean the most. Be present, laugh often, and let yourself feel every magical second. These memories are yours to treasure forever.

Bonus Tips for a Stress-Free Wedding

  • Use apps and shared spreadsheets to stay organized.
  • Delegate tasks; you don’t need to do it all alone.
  • Add buffer times to your schedule for unexpected delays.
  • Stay flexible and lighthearted, sometimes little surprises make the best memories.

By following this timeline, your wedding planning won’t just be manageable; it’ll be joyful. Stay organized, savor the process, and get ready for a celebration you’ll never forget.

This post is generated by ChatGPT
How to Choose Your Perfect Wedding Dress: A Step-by-Step Guide for Every Bride

Beautiful bride in an elegant white ball gown posing outdoors on a sunny day beside a white balustrade and garden backdrop.

Finding your wedding dress is one of the most magical moments in your wedding planning journey. It’s when your vision for the big day starts to feel real, when fabric, style, and design come together to reflect you. But with endless options, countless opinions, and Pinterest boards overflowing with ideas, the process can feel a bit overwhelming. Don’t worry, this step-by-step guide will help you navigate the experience so you end up with a dress that makes you feel confident, radiant, and completely yourself when you walk down the aisle.

Step 1: Start with Your Personal Style, What Makes You Feel Beautiful?

Your wedding dress should be a true reflection of your personality. Are you all about timeless elegance, carefree boho vibes, chic minimalism, or vintage glamour? Before stepping into a bridal salon, spend time figuring out what resonates with you.

Flip through bridal magazines, explore Pinterest boards, and browse designer collections. Think about past outfits you’ve adored. Did they feature soft flowing fabrics, intricate lace, dramatic trains, or sleek silhouettes? This inspiration will help you narrow down the endless choices and make your search more focused. It also ensures your dress flows beautifully with your wedding’s overall vibe.

Step 2: Discover the Silhouettes That Flatter You Most

Every bride’s body is unique, and luckily, wedding gowns come in silhouettes designed to highlight different features:

  • A-Line: Universally flattering, this shape gently flares from the waist for balanced proportions.
  • Ball Gown: The ultimate fairytale look, with a full skirt that emphasizes the waist and softens the hips.
  • Mermaid: Fitted from chest to knee, then flaring dramatically, perfect for showing off curves.
  • Sheath: Simple, sleek, and elegant, ideal for petite or slender brides.
  • Empire Waist: Flows from just under the bust, elongating the body while offering comfort.

Don’t be afraid to try on multiple silhouettes; you might be surprised which one makes you feel unstoppable. The best dress doesn’t just fit your body; it amplifies your confidence.

Step 3: Set, and Stick to, Your Budget

Wedding dresses range from budget-friendly to “royal wedding” prices, so it’s essential to set a clear budget before shopping. Keep in mind: alterations, accessories, and undergarments will add to your total cost.

If your dream dress happens to be a little over budget, explore creative solutions, sample sales, off-the-rack finds, or even pre-loved gowns. The perfect dress for your price range is out there, waiting for you.

Step 4: Match Your Dress to Your Theme and Venue

Your wedding location and theme should complement your gown choice. For a breezy beach ceremony, think lightweight fabrics and relaxed silhouettes. If you’re exchanging vows in a grand ballroom, opt for something timeless and luxurious. A romantic garden wedding might call for delicate lace or flowing skirts.

When your dress suits the setting, it not only looks incredible in person but photographs beautifully too.

Step 5: Shop at the Right Time

Begin your search about 8–12 months before the wedding. This gives you plenty of time for ordering, shipping, and multiple fittings without the panic of a tight deadline. Rushing this process can limit your options and add unnecessary stress.

Step 6: Make the Most of Bridal Salon Visits

Bring only one or two trusted friends or family members to avoid being overwhelmed by too many opinions. Keep an open mind, some of the best “yes” moments happen when you try on a style you never expected to love.

Wear minimal makeup to keep dresses clean and bring your wedding shoes, or a similar heel height, for accurate fittings. Above all, stay present and enjoy every second of this once-in-a-lifetime experience.

Step 7: Recognizing “The One”

When you’ve found your dress, you’ll feel it instantly. It will fit your body and your personality like it was meant to be. Your reflection in the mirror will light you up, and you’ll feel an emotional connection that’s hard to explain.

It should also be comfortable, no pinching, itching, or stiffness. If it makes you want to dance, smile, and stand tall, you’ve found your match.

Step 8: Perfecting Your Look with Accessories and Alterations

Once your dress is chosen, start thinking about accessories, a delicate veil, statement earrings, a shimmering belt, or elegant shoes that elevate your look. Schedule your first fitting about 2–3 months before the wedding so your seamstress has time to perfect the fit.

Step 9: Preserve Your Dress After the Big Day

If you plan to keep your gown as a cherished keepsake or pass it down someday, arrange for professional cleaning and preservation. Proper storage will keep the fabric pristine and the memories intact for years to come.

Enjoy the Journey

Choosing your wedding dress is more than a task; it’s a milestone. With clarity on your style, body shape, budget, and wedding vision (plus the right timing and support), you’ll find the gown that makes you glow from the inside out.

So savor this chapter, because walking down the aisle in a dress that’s completely, undeniably you is a feeling like no other.

This post is generated by ChatGPT
The Essential Details Every Wedding Invitation Must Have: A Complete Guide

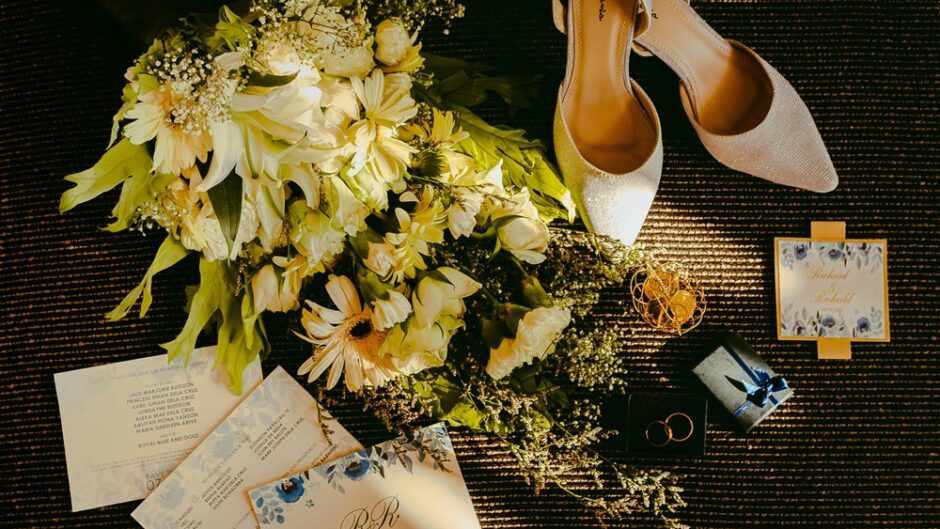
Elegant flat lay of wedding invitations, bridal shoes, bouquet of white flowers, gold rings, and gift boxes arranged beautifully on a textured surface.

Your wedding invitation isn’t just paper and ink; it’s the very first sparkle of magic your guests will see from your big day. It’s your event’s opening act, setting the tone, building excitement, and giving your loved ones a sneak peek into the celebration ahead. With so much riding on this little card, it’s essential to include all the important details so your friends and family know exactly how, when, and where to join the fun.

In this guide, we’ll walk through the must-have elements that make your invitation clear, stylish, and unforgettable, plus some thoughtful extras that will wow your guests. Whether you’re planning a cozy backyard “I do” or a grand ballroom soirée, these tips will help you create invitations that are as beautiful and meaningful as your wedding itself.

Why Your Wedding Invitation Matters

Think of your wedding invitation as a mini movie trailer for your big day, it gives your guests a taste of the mood, theme, and style you’re going for. Whether your vibe is elegant and timeless, modern and chic, or quirky and fun, your invitation will set the stage for everything to come.

A well-crafted invite helps guests feel included and connected to your celebration long before they arrive. Even better, a clear invitation cuts down on confusion, reduces last-minute questions, and ensures everyone knows what to expect.

The key? Every important detail should be spelled out clearly, but with a personal, heartfelt touch. Let’s dive into exactly what to include.

The Essential Details Every Wedding Invitation Must Have

  1. Make It Clear It’s a Wedding Invitation

Start with wording that leaves no doubt: this is a celebration of love! Traditional phrases include “You are cordially invited to the wedding of…” or “Together with their families…”. For a modern twist, you might say “Join us for the wedding celebration of…”. Whatever your style, let your opening line warmly invite guests into your special day.

  1. Who’s Hosting the Celebration?

Traditionally, the invitation lists the hosts, often the bride’s parents or both families, right at the top. For example: “Mr. and Mrs. Smith request the honor of your presence…”. These days, many couples opt to list their own names as hosts or use casual wording like “Together with their families, Sarah and John invite you…”.
Including host names adds a touch of formality and acknowledges the love and support behind the event.

  1. The Couple’s Full Names

Be sure to clearly spell out both your full names. Traditionally, the bride’s name appears first, but you can arrange them however you feel right for you. Display them proudly, this is your day!

  1. The Date and Time, Be Specific

Write out the full date (no shortcuts!) for a timeless look: “Saturday, the fifteenth of June, two thousand twenty-five.” Pair it with the exact ceremony start time, no vague “late afternoon” or “evening.” Instead, use a format like “at four o’clock in the afternoon.” Specificity helps guests plan their day with ease.

  1. Venue Names and Complete Addresses

List both ceremony and reception venues if they’re in different spots, along with complete addresses, street, city, and postal code. If GPS might be tricky, consider adding landmarks or short directions so no one gets lost.

RSVP Details: Your Guests’ Action Plan

The RSVP is your planning lifesaver. Be clear about how and when to respond:

  • Include a traditional RSVP card with a pre-addressed, stamped envelope.
  • Or offer a digital RSVP option via your wedding website with easy instructions.
  • Set a firm RSVP deadline at least 3–4 weeks before the wedding so you can finalize numbers.
  • If needed, include meal choices or plus-one options for guests to indicate.

A clear RSVP process means less chasing, less guessing, and more peace of mind.

Dress Code or Attire Guidelines

If you have a dress code, mention it briefly, “Black Tie,” “Beach Formal,” or “Cocktail Attire.” If you think guests might be unsure, add a short explanation so everyone feels confident about what to wear.

Recommended Extras to Elevate Your Invitation

While the essentials cover the basics, these extras can make your invitations even more guest-friendly and memorable:

  1. Transportation and Parking Info

If parking is tricky or you’re offering a shuttle, share those details on an extra card or your wedding website.

  1. Accommodation Suggestions

Out-of-town guests will appreciate hotel recommendations or local Airbnb options. Including this info shows thoughtfulness.

  1. Wedding Website Link

A wedding website is the modern-day hub for everything, from your love story to schedules, maps, registry, and FAQs. Share the link tastefully.

  1. Gift Registry Information

A small enclosure card or a discreet mention on your website works well. Many couples use wording like, “Your presence is the greatest gift, but should you wish to honor us with a present…”

  1. Details for Additional Events

If you’re hosting extra gatherings like a rehearsal dinner or next-day brunch, include the details separately so guests can plan ahead.

Crafting the Perfect Tone and Style

Your wording should match your wedding’s personality:

  • Formal: “The honor of your presence is requested…”
  • Casual: “Please join us for a joyful celebration…”
  • Whimsical: “Put on your dancing shoes and join us…”

Pair your words with fonts, colors, and paper textures that align with your wedding aesthetic for a cohesive, unforgettable look.

Visual & Practical Tips for Invitations

  • Quality Stationery: Choose paper and envelopes that feel as special as your day.
  • Enclosure Cards: Keep the main invite clean, add extra cards for RSVPs, maps, or extra events.
  • QR Codes: A modern, space-saving way to link guests to your website, RSVP form, or maps.

Readable Layout: Clear fonts, good spacing, and short sentences keep info easy to follow.

Your Invitation as a Love Letter

Your wedding invitation is the first “hello” to one of the most unforgettable days of your life. By including every detail with warmth and style, you’re showing guests how excited you are to share this moment with them.

Take your time crafting it, let your personalities shine through, and you’ll spark genuine excitement, anticipation, and joy long before the big day arrives!

This post is generated by ChatGPT

7 Essential Steps to Choosing the Perfect Wedding Venue for Your Big Day

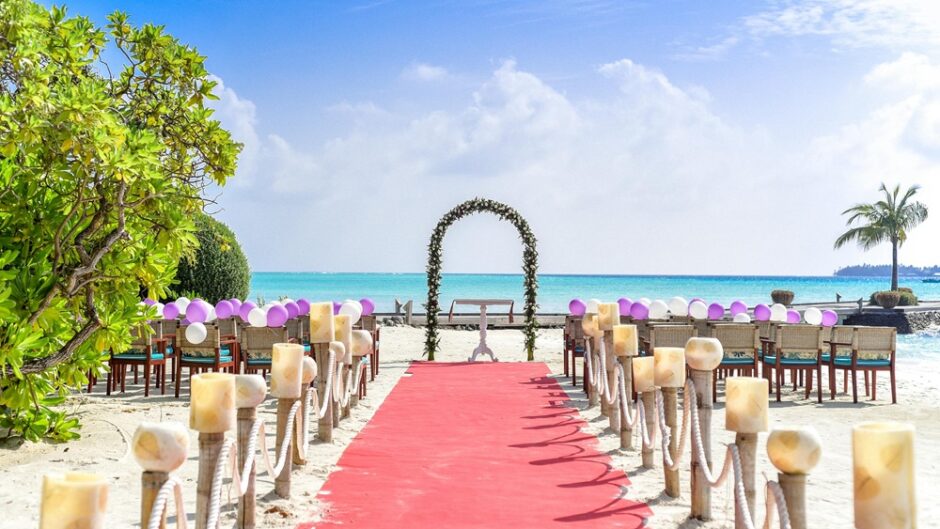
Beach wedding venue with red carpet aisle, floral arch, and chairs decorated with purple and white balloons under a clear blue sky

Planning your wedding is one of the most exciting journeys you’ll ever take. Among all the decisions on your list, choosing the perfect venue is arguably the most important. The venue not only sets the stage for your big day but also helps shape the mood, style, and flow of your celebration. But with so many options out there, how do you find “the one”?

Don’t worry, you’re in the right place! Here are 7 essential steps to help you confidently choose a wedding venue that feels just right for you and your partner. Let’s dive in!

Define Your Wedding Style and Vision

Before you even start looking at venues, get clear on your wedding style. Are you dreaming of a romantic garden ceremony, a rustic barn celebration, a chic modern affair, or perhaps a beachside soirée? Your style is the heartbeat of your wedding; it colors every decision from decorations to dress code, and especially your venue choice.

Take some time to create a mood board or Pinterest board with ideas that inspire you. This will help you recognize venues that align with your vision and avoid places that just don’t “fit.” Remember, your venue should feel like a natural extension of the story you want to tell on your wedding day.

Set Your Wedding Date and Check Venue Availability

Once your style is clear, it’s time to lock in your wedding date or at least have a few potential dates in mind. Venues often get booked up far in advance, especially during popular wedding seasons, so flexibility here can open many more doors.

If you’re eyeing a specific venue, reach out early to check availability. Sometimes shifting your date by a few days or choosing an off-peak season can make all the difference, both in price and options. Being proactive here helps you avoid disappointment down the line and gives you a realistic picture of what’s possible.

Estimate Your Guest List Size and Budget

Knowing how many guests you plan to invite is crucial for narrowing down venues. A space that feels cozy for 50 guests might feel cramped for 150. On the flip side, a huge ballroom can feel empty if only a small group shows up. So, get those invitees counted early!

Equally important is your budget. Venues vary wildly in price, not only by size but also by location, services, and exclusivity. Be upfront about what you can spend and consider what’s included in the venue fee. Does it cover tables, chairs, linens, or do you need to rent separately? Is catering included or do you need an outside option?

Keeping these questions in mind will help you avoid hidden costs and stay on track financially.

Tour Venues and Evaluate Size, Layout, and Ambiance

There’s no substitute for visiting venues in person. When you tour, bring your partner, your planner (if you have one), or even a trusted friend whose opinion you value. Here’s what to look for:

  • Size & Layout: Will it comfortably fit your guest list? Is there space for dancing, dining, and mingling?
  • Ambiance: Do the lighting, decor, and general vibe match your style? Imagine how your decorations and wedding attire will look.
  • Flow: How will guests move between the ceremony, cocktail hour, and reception? Look out for bottlenecks or confusing transitions.
  • Photo-friendly Spots: Are there beautiful backdrops for wedding pictures? Natural light and pretty views can elevate your album tremendously.

Pay attention to your gut feeling as well, if a venue just doesn’t “spark joy,” it’s okay to cross it off the list.

Assess Venue Amenities and Services

A venue often comes with a package of amenities and services, and these can vary widely. Ask about:

  • Catering options: Is there an in-house caterer, or do you have to hire your own? Are special dietary needs accommodated easily?
  • Parking and transportation: Is there ample parking? Are shuttles or public transport available for guests?
  • Bridal suite: Having a private, comfortable space to get ready can make a big difference.
  • Audio/Visual equipment: If you plan speeches, music, or videos, check what tech is included and how easy it is to use.
  • Weather contingencies: If part of your event is outdoors, is there a backup plan?

These small but important details can save you headaches on the big day.

Consider Location and Accessibility for Guests

Think about your guests’ convenience when picking a location. Is it easy to find? Close to airports or major highways? Are there nearby hotels or accommodations for out-of-town guests?

Also consider the neighborhood’s vibe. Is it quiet or bustling? Will the surroundings complement your wedding photos?

Keep in mind that a remote venue might be stunning but could add travel time and cost for your guests. Balancing beauty with practicality is key.

Read Reviews and Seek Recommendations Before Deciding

Before you sign on the dotted line, do some homework. Read online reviews to get a sense of other couples’ experiences. Pay attention to comments about service, flexibility, and problem-solving.

Don’t hesitate to reach out to friends, family, or even vendors who might have insider knowledge about your prospective venue. Sometimes, a firsthand tip can uncover hidden gems—or alert you to potential red flags.

Enjoy the Journey and Celebrate Your Choice!

Choosing your wedding venue is a milestone on your wedding journey. It takes time and thoughtful decision-making, but with these 7 steps, you’ll be equipped to find a place that feels just right.

Remember, the perfect venue is the one where you and your partner feel happy, comfortable, and excited to celebrate surrounded by the people you love. Your venue sets the tone for one of the most memorable days of your life, so take the time to enjoy the process, trust your instincts, and get ready to make beautiful memories!

If you keep these steps in mind, you’ll not only pick a beautiful venue but also pave the way for a seamless, joyful wedding day. Here’s to finding your perfect place to say “I do”!

This post is generated by ChatGPT

When to Start Planning Your Wedding for a Stress-Free Celebration

Stress-Free Wedding Celebration

Planning a wedding is one of the most thrilling adventures a couple can share. But the big question is: when should you start planning your special day to make it smooth and stress-free? Timing is everything! Start too late, and you risk scrambling at the last minute; start too early, and it might feel overwhelming. The sweet spot for most couples is about 12 to 18 months before the wedding day. Here’s why beginning within this timeframe is a game-changer, and how to confidently map out your journey with joy and excitement.

Why Starting Early Makes a Difference

Getting a head start, about a year or more ahead, brings plenty of perks. You’ll have access to top venues and vendors before they get booked up, giving you the freedom to choose what truly fits your vision and budget. Early planning also helps spread out your expenses, so you’re not hit with a mountain of costs all at once. Most importantly, it eases stress by giving you the breathing room to make thoughtful decisions instead of rushing through important choices under pressure. This relaxed pace makes the whole process more enjoyable and helps you craft a celebration that really feels like you.

Your Month-by-Month Wedding Planning Timeline

Keep your plans on track and your stress low with this handy timeline:

12-18 Months Before:

  • Announce your engagement and set the wedding date.
  • Draft your guest list to get an idea of the size.
  • Book your dream venue, these spots go fast!
  • Hire key vendors like photographers and caterers.
  • Set a preliminary budget.
  • Start shopping for your wedding attire.

9-12 Months Before:

  • Send out save-the-date cards.
  • Choose your wedding party.
  • Book your officiant.
  • Plan honeymoon options.

6-9 Months Before:

  • Finalize your guest list.
  • Create your wedding registry.
  • Shop for attire and accessories.
  • Arrange transportation.
  • Order invitations.

3-6 Months Before:

  • Send invitations.
  • Schedule hair and makeup trials.
  • Finalize menu and cake.
  • Plan ceremony details.
  • Buy wedding rings.

1-3 Months Before:

  • Confirm all vendor bookings.
  • Final dress fittings.
  • Prepare welcome bags or favors.
  • Plan your seating chart.
  • Apply for your marriage license.

Last Month:

  • Finalize your RSVP list.
  • Prepare payments for vendors.
  • Pack for your honeymoon.
  • Relax and enjoy all your pre-wedding celebrations!

Tips for a Shorter Planning Timeline

If you have less than a year to plan, don’t stress! Focus on locking in your venue and essential vendors first. Consider vendors who offer all-in-one packages to save time. Simplify your plans by choosing local vendors, trimming your guest list, and streamlining your ceremony and reception. Use wedding planning apps or hire a day-of coordinator to keep everything running smoothly and stress-free.

Finding Balance Between Planning and Enjoying

Remember, your engagement is a special time to savor. Don’t let planning take over your life! Set boundaries by scheduling dedicated planning times and sticking to them. Include your partner in decisions to share the excitement and lighten the load. Take breaks to enjoy date nights and celebrate your love, these moments are just as precious as the big day itself.

Stay Organized and Confident

Use checklists, calendars, and wedding planning apps to keep all your details in one place. Stay flexible, sometimes plans change, and that’s perfectly okay! Keep a positive mindset, your perfect day is about your love story, not perfection. Reach out to friends, family, or professionals if you need support along the way.

Final Thoughts

Starting your wedding planning about 12 to 18 months before your big day is the best way to create a joyful, stress-free celebration. This timeline lets you secure your dream vendors, manage your budget wisely, and truly enjoy every step of the journey. Whether you have a full year or just a few months, planning with intention and an open heart will make your wedding an unforgettable adventure filled with happiness.

So get ready to dive into your planning adventure with excitement and confidence. Your perfect wedding, and the memories you’ll cherish forever, are just ahead!

This post is generated by ChatGPT